Since the introduction of the Windows Subsystem for Linux in Windows 10, it is possible to install Linux software on a Windows PC. This comes in handy for people who would like a local CQPweb installation without the hassle of a virtual machine. You can find a step-by-step guide below, which was tested with revision 1183 from CQPweb’s subversion repository.
-
- Enable Windows Subsystem for Linux as described by Microsoft.
- Open the Microsoft Store and download Debian.
- Run Debian. You should now be good to go.
- Now, let us update the system and download dependencies needed. You will have to enter your password when you enter the first line.
sudo apt -y update
sudo apt -y upgrade
sudo apt -y install apache2 mysql-server subversion php build-essential r-base libapache2-mod-php php-mysql php-gd sendmail
- Install CWB. Line 4 gives you the version number you need to use in steps 6 and 12.
svn co http://svn.code.sf.net/p/cwb/code/cwb/trunk cwb cd cwb sudo ./install-scripts/install-linux ls /usr/local/ | grep cwb - You can skip this step in the current version if you only intend to use CQPweb via the web interface. If you want to index corpora on the command line, it is still recommended to install this package. Install cwb-perl. Change version number to the one noted in step 5.
cd svn co http://svn.code.sf.net/p/cwb/code/perl/trunk cwb-perl cd cwb-perl/CWB # CHANGE VERSION NUMBER IN THE FOLLOWING LINE IF NECESSARY: perl Makefile.PL --config /usr/local/cwb-3.4.16/bin/cwb-config make make test sudo make install - Change PHP settings:
cd /etc/php/7.0/apache2/
sudo nano php.ini
# CHANGE, ADD OR UNCOMMENT SO THAT THE FOLLOWING LINES ARE ACTIVE IN php.ini
upload_max_filesize = 80M
post_max_size = 80M
memory_limit = 512M # THIS IS GENEROUS
max_execution_time = 60
mysqli.allow_local_infile = On
- Set up directory structure. I chose /data as the place where things should go, but you could think about using /mnt/c/data, which is the folder “data” on your Windows C: drive, so it is more easily accessible from Windows.
sudo mkdir /data
cd /data
sudo mkdir corpora
cd corpora
sudo mkdir cqpweb
cd cqpweb
sudo mkdir upload
sudo mkdir tmp
sudo mkdir corpora
sudo mkdir registry
cd /data
sudo chown -R www-data corpora
- Apache2’s default settings work, so we just need to start the server:
sudo service apache2 start
Now the Windows firewall settings are going to crop up. I just allowed everything, so that colleagues can use the server and I can use it from another computer. If you are concerned about this, you might be able to refuse outside access here. There may be a warning issued by starting apache2 (“Protocol not available: AH00076: Failed to enable APR_TCP_DEFER_ACCEPT”), but it can be ignored. In order for the new firewall settings to come into effect, restart the web server:
sudo service apache2 restart
- Set up the MySQL database. Make sure to change the string MYSECRETPASSWORD to something else and note it somewhere.
sudo service mysql start
sudo mysql
# The following commands have to be entered in MySQL:
create database cqpweb_db default charset utf8;
create user cqpweb identified by 'MYSECRETPASSWORD';
grant all on cqpweb_db.* to cqpweb;
grant file on *.* to cqpweb;
exit;
Note if you are using some loder version of Debian/Ubuntu: Instead of “sudo mysql”, line 2 has to be “mysql -u root -p” with the password that was used during the installation of the mysql-server
- Download CQPweb web scripts and run the setup. Notes: (1) If you used a different path in step 8 above, you will have to use that instead of /data/. (2) Change MYSECRETPASSWORD to whatever you used in the previous step. (3) The password for the user cqpwebadmin is a different password. Create a new one here and note it somewhere.
cd /var/www/html
sudo svn co http://svn.code.sf.net/p/cwb/code/gui/cqpweb/trunk CQPweb
cd /var/www/html/CQPweb/bin
sudo php autoconfig.php
# Enter admin user name, e.g. cqpwebadmin
# Paste the following
/data/corpora/cqpweb/corpora
/data/corpora/cqpweb/registry
/data/corpora/cqpweb/tmp
/data/corpora/cqpweb/upload
cqpweb
MYSECRETPASSWORD
cqpweb_db
localhost
# END OF PASTED STUFF
sudo php autosetup.php
# Enter a password for the user cqpwebadmin
- Since we installed CQPweb in a version-specific directory, we need to add the path to CQPweb’s config. Also, for now, if we skipped step 6, we need to add the last line about using the new ceql.
cd /var/www/html/CQPweb/lib
sudo nano config.inc.php
# Add the following line to the section "server directory paths", adjusting the version number we found out in step 6.
$path_to_cwb = '/usr/local/cwb-3.4.16/bin';
$use_the_new_ceql = true;
- Change the rights to the CQPweb folder:
cd /var/www/html
sudo chown -R www-data CQPweb/
- Now open your web browser, connect to http://localhost/CQPweb and log in as cqpwebadmin with the password you created in step 11.Congratulations, you have installed CQPweb on your Windows machine!
- Step 15 is for starting CQPweb services manually after reboot. If you prefer CQPweb services to be available when you log on, go to steps 16-18.
After reboot, start Debian and type in the following two commands:sudo service mysql start sudo service apache2 start
- To start the system at reboot, let us create a script that starts both services:
echo "service mysql start" >> /data/start_cqpweb_services.sh
echo "service apache2 start" >> /data/start_cqpweb_services.sh
chmod +x /data/start_cqpweb_services.sh
- Now let us tell the system that we want this script to run with elevated rights without asking for the password. In the following, replace YOURUSERNAME with your username (i.e. the part before the @-symbol in the command prompt of the Debian window).
sudo visudo
# Add the following line to the bottom of the file, exit with CTRL+x and hit y for "yes".
YOURUSERNAME ALL=(root) NOPASSWD: /data/start_cqpweb_services.sh
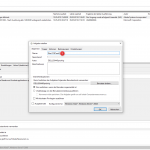
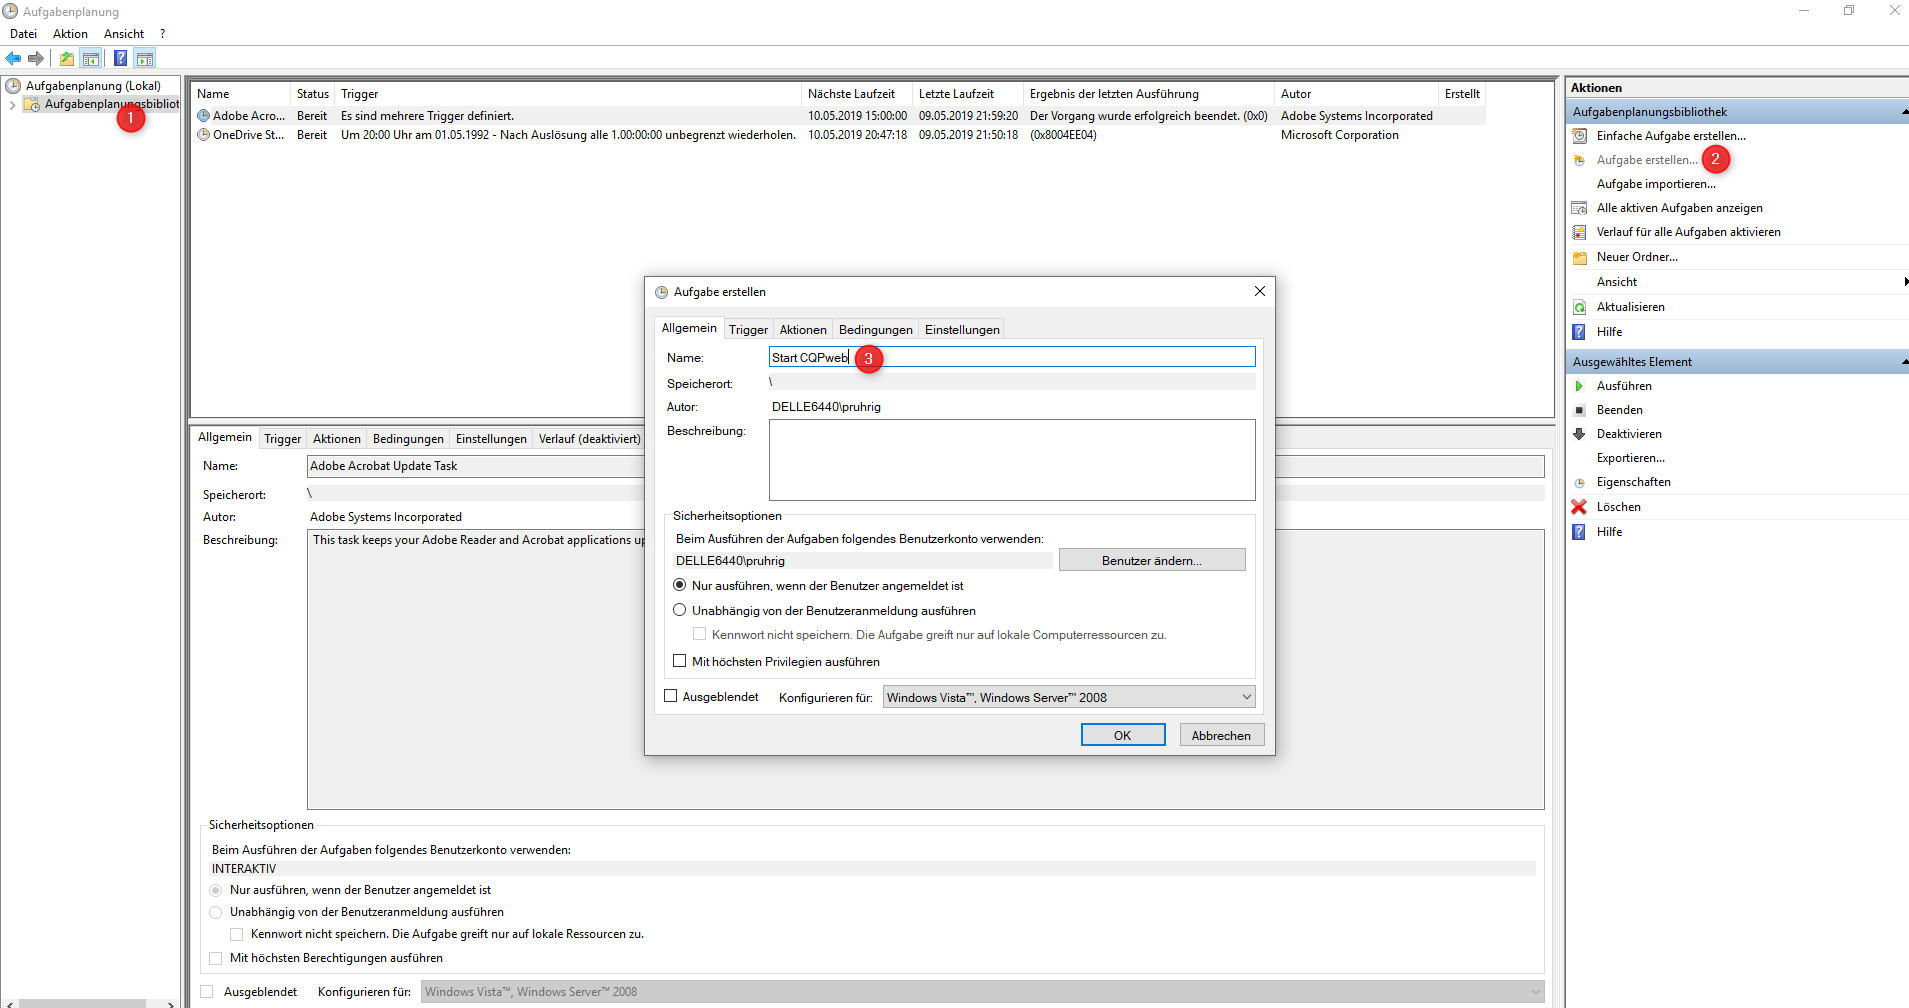
- Go to the Windows task scheduler set up a task as follows:
Open the start menu and type “Task Scheduler” to find the application and run it.Now, click “Task Scheduler Library” on the left and then “Create Task…” on the right to create a new task you can configure to run your script with these steps:- Name the task anything you want, like “Start CQPweb services”
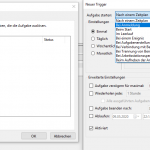
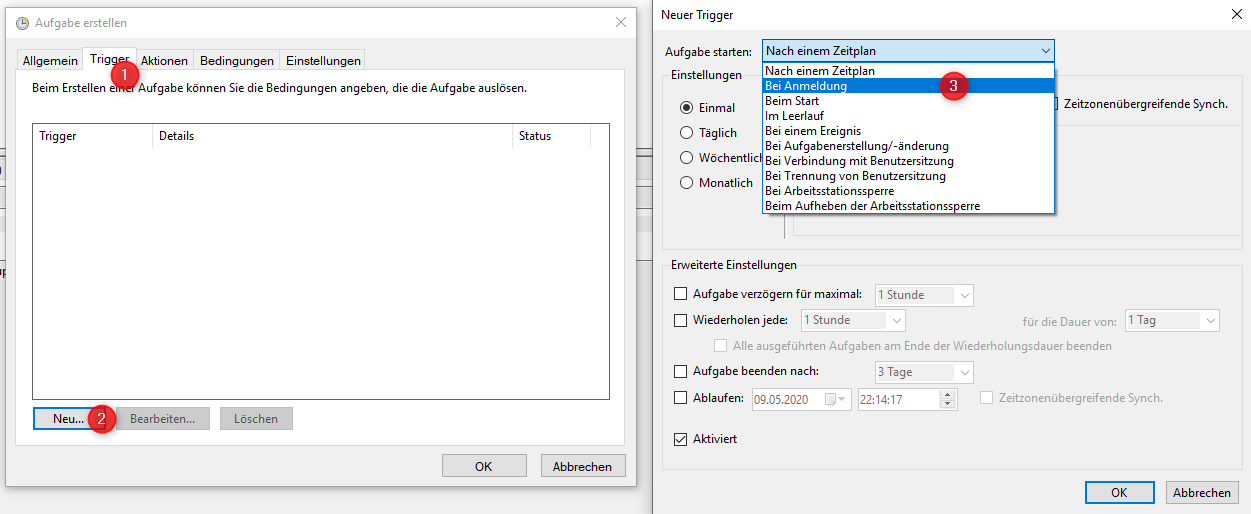
- Under the “Triggers” tab, click “New…” to add a new trigger for this task
- In the “Begin the task” dropdown select “At log on”
- Select “Any user” or leave it at just your user – whichever you prefer.
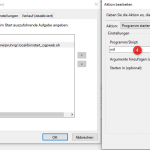
- Under the “Actions” tab, click “New…” to add a new action for this task
- Pick “Start a program” for the action type and then enter
wslas the program to run - Finally, as the last and most important step, at “Add arguments (optional)” set this argument string to run the command with:
-d debian -e sudo /data/start_cqpweb_services.sh
[Red text adapted from dev.to]
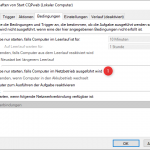
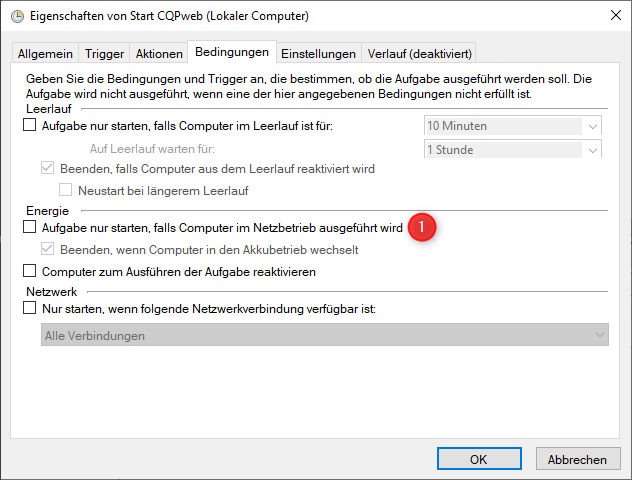
Update: There is a Gotcha in the settings of the Task Scheduler for users who use a laptop computer: By default, a setting was active in my task to only run it when the computer was connected to mains power. Make sure you uncheck this (under “Conditions”) if you want the services to start at logon even if you are on battery power.
To illustrate this process, I have made 4 screenshots. They are in German, but with the description above and the locations of where to click on the screenshots, I hope they will still be useful.

These instructions are actually great and CQPweb works like a charm!
Two remarks:
1) In my case the wsl-command (step 18) didn’t like the options -d and -e (I din’t have the time to get to the root of the problem). So – since I’m only using one wsl instance – it’s just the command “wsl” and “sudo /data/start_cqpweb_services.sh” in the arguments.
2) It might be useful for people who like to call the corpus workbench via command line (e.g. for encoding) to add the following in ~/.bashrc:
export PATH=”/usr/local/cwb-3.4.16/bin:$PATH”
export CORPUS_REGISTRY=”/data/corpora/cqpweb/registry”
Hi Gerhard,
Thanks for your feedback and the additional explanations!
Ad 1): I have two ideas of what could have gone wrong:
a) I think the parameters I used are relatively recent additions to wsl.exe, as far as I know. You may be on a corporate update cycle for Windows provided by your employer and thus may receive Windows updates with a certain delay because they are first tested by IT services. But if it works with the settings you posted, then that is great!
b) Check the edit I made in step 18 above – took me a bit to figure out why it only worked from time to time…
All the best,
Peter
Hi Peter,
Thanks a lot, you were spot-on with the update cycle! The second issue with the (strange) default unplugged settings I had changed already – I thought this was only a some local problem of mine.
I’m definitely looking forward to your new guide when WSL 2 gets released 😉
Best,
gerhard
Hi Peter,
Thanks a lot for your excellent work!
I almost success but got some errors when I executed the “sudo php autosetup.php” (step11), # Enter a password for the user cqpwebadmin# didn’t occur but something showed below :
######start########
Now finalising setup for this installation of CQPweb….
Installing database structure; please wait.
An SQL query did not run successfully!
Original query:
CREATE TABLE `text_metadata_values` (
`id` int unsigned NOT NULL AUTO_INCREMENT,
`field_id` int unsigned NOT NULL,
`handle` varchar(200) CHARSET ascii COLLATE ascii_bin NOT NULL,
`description` varchar(255) CHARSET utf8mb4 collate utf8mb4_unicode_520_nopad_ci default ”,
`n_texts` int unsigned NOT NULL default 0,
`n_tokens` bigint unsigned NOT NULL default 0,
unique key `field_id_handle`(`field_id`, `handle`),
key
) ENGINE=InnoDB
/* from User: ??? | In file: /var/www/html/CQPweb/bin/autosetup.php @ line 104 | 2020-Aug-06 08:58 */
Error # 1064: You have an error in your SQL syntax; check the manual that corresponds to your MariaDB server version for the right syntax to use near ‘) ENGINE=InnoDB
/* from User: ??? | In file: /var/www/html/CQPweb/bin/auto…’ at line 10
……
######end########
seems like something goes wrong when creating tables, I tried to read the code to figure out what’s going on, saddly it beyong what I can do and I can’t google out anything helpful about this.
Hi Eason,
Thanks for your message! I’m not familiar with this error, but it does not look WSL-specific to me. You may want to ask about this problem on the CWB mailing list, describing what you did. Andrew (the author of CQPweb) is usually good at replying to users who get stuck. Sorry I cannot be of more help!
Best wishes,
Peter
Thanks for your reply, it is really helpful for me!
Best wishes!